This image shows my flexible metal feather-boards at work.
Introduction
From what I have read and observed, a lot of veneer slicing is done by simply using hand pressure. Whatever works is fine, but my preferance is to remove as many variables from the equation as I can. Hand pressure while veneering, IMHO, is a variable that I want to eliminate because it just is not as consistent and reliable as a mechanical pressure device. I know that's debatable, but this is my preference.
Wooden Feather-Boards
That said, like most of us, I've made and used wooden feather boards for quite some time for my veneer work. While they worked well enough, I just did not like the fact that they seemed too unwieldly in so far as setting them up for veneer work on the bandsaw. I felt that their pressure was difficult to set up uniformly along their length.
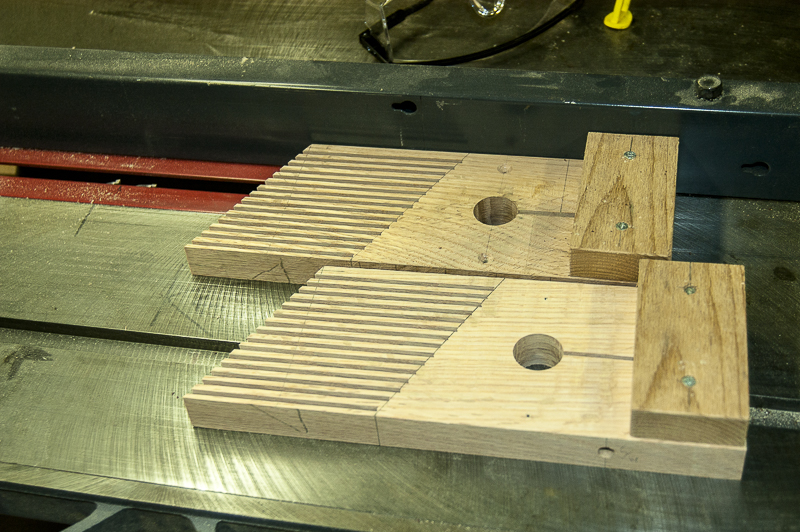
This image shows my original oak feather-boards freshly-cut by my table saw.
This image shows the wooden feather-boards supporting a walnut board being veneered.
So, I set out to make a feather board that was more to my liking and suited my work flow much better.
Flexible Feather-Boards
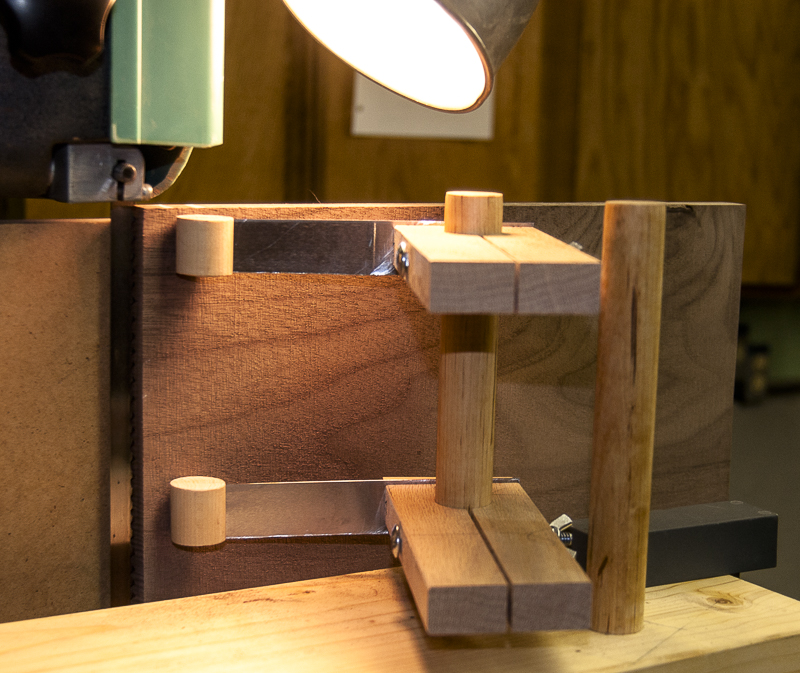
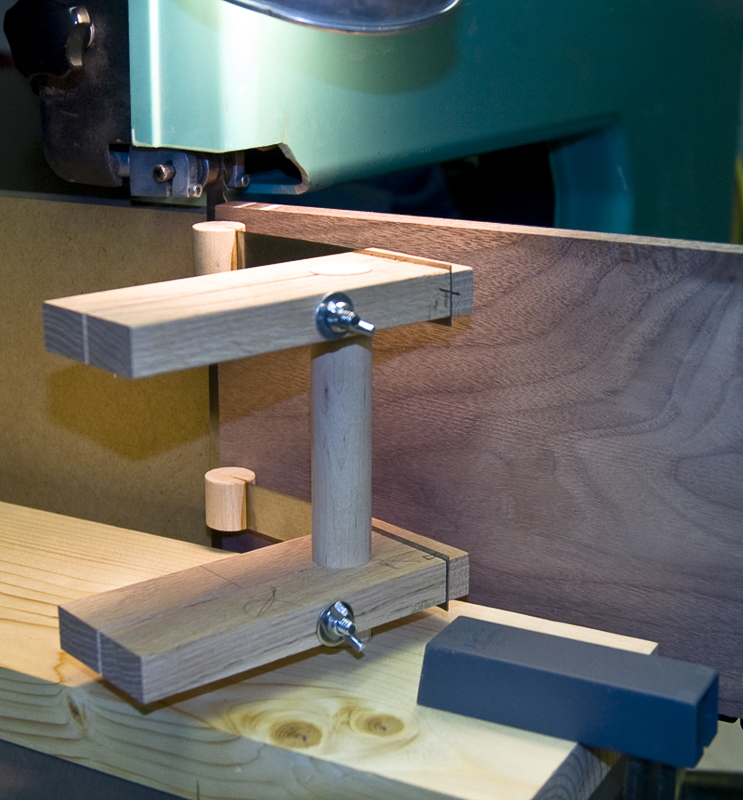
This image shows the metal feather-boards supporting a walnut board during veneering.
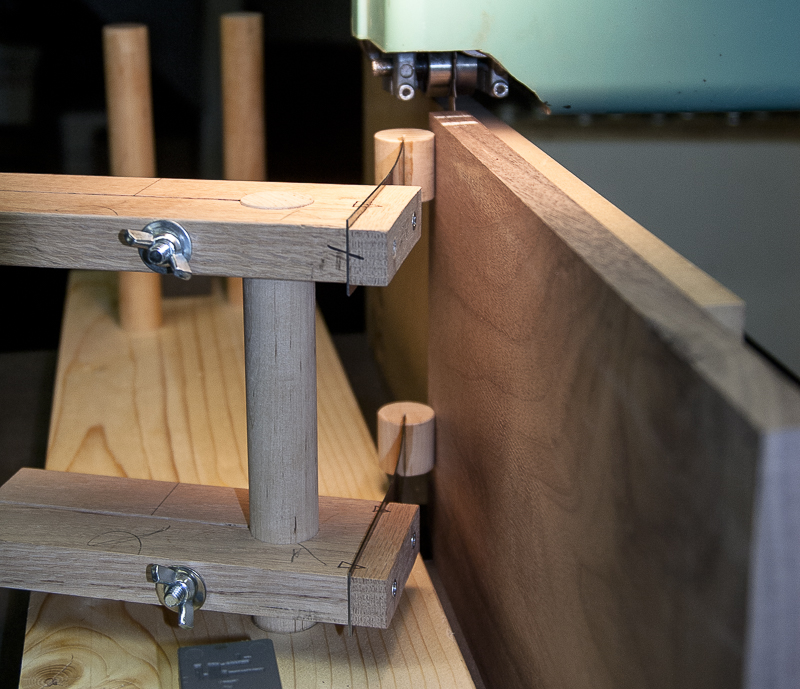
What I finally settled on - after several misfires - was to use scraper stock for the flexible arms. I took my Dremel tool and cut the scraper in half lengthwise. I then added a dowel segment to the tips (as shown above) and attached the other end to my hold-down adjustable clamps. The tension is adjusted by rotating the clamp towards the board and locking it in place with the wing nut. This is clearly shown in Image 4 above.
Each flexible feather-board can be adjusted separately to suit. It takes very little effort to tension and lock them in place. They can be raised to suit your needs. My preference is to set one close to the bottom of the board and the other as close to the top as is possible.
One caveat that you need to be aware of - or you will learn the hard way, is that you cannot set the dowel ends too close to the blade. If the dowels are too close to the cutting edge of the blade they could spring into the rotating blade at the end of the cut. This could ruin the dowels and possibly the band saw blade if the blade cuts into the scraper stock.
With the bandsaw shut down, I test this by adjusting the flex arms against the stock and then removing the stock. If possible, I like to have each flex arm no closer than 1/4-inch from the blade edge with the board removed.
When veneering, I've tried slicing my board with my tall fence support on either side of the board. I've also tried slicing my veneer with the blade cutting on the fence side of the board and with the blade on the opposite side of the board. In truth, I have had decent results with all setups, but this is assuming the following:
- Your bandsaw table is perpendicular to your blade
- Your board is dimensionally true on all sides
- Your fence is perpendicular to your bandsaw table
- Your fence has been set to match the drift of your bandsaw blade (if any)
When slicing veneer it is important to heed all the pertinent details.
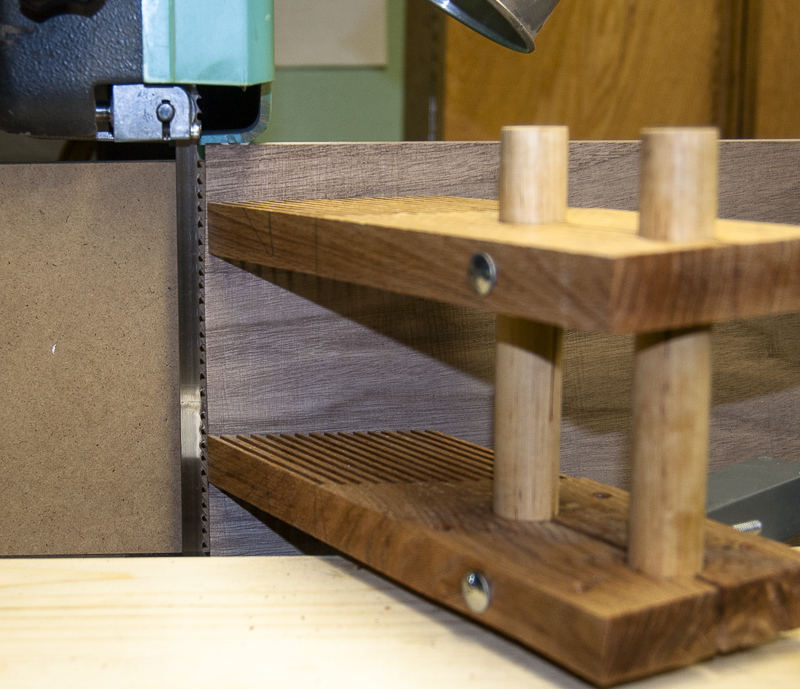
This image is another view of the flexible feather boards.
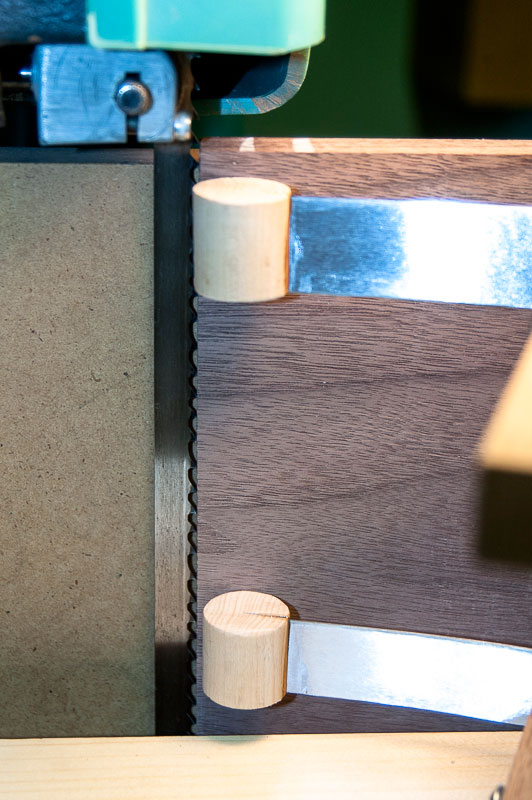
This image shows the dowel ends set close to the blade.
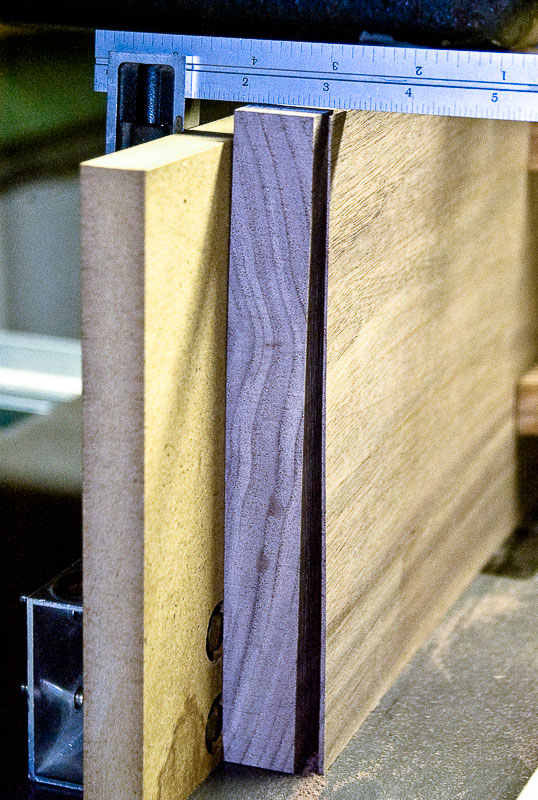
This image shows a very thin veneer slice. It is approximately 1/32-inch top-to-bottom.
I hope I've explained these flexible feather-boards clearly enough for you to make your own. If you have any questions just drop me a line.
Good luck!